
Hell’s Gate Cycling and Hiking Guide
Choose the bike, route, pace and hiking option around the people travelling, the weather and the park’s live safety guidance.
- Choose the experience before choosing the bike
- What the cycling route actually feels like
- Distance is not the whole difficulty
- Inspect the exact bicycle
- Bike fit matters more than the brand
- Ordinary bike versus e-bike
- When a support vehicle is worth it
- Plan for punctures and mechanical failure
- Learn the e-bike before the loose ground begins
- Start early for comfort, wildlife and margin
- Heat, sun and water
- Dust, wind and rain
- Share the road predictably
- Wildlife distance on a bicycle
- Birds and cliff life reward slow riders
- Hiking without pretending every trail is open
- Gorge safety and flash floods
- A good hike does not require the lower gorge
- Geothermal areas are not a spa trail
- Fischer’s Tower and climbing
- Should you hire a guide?
- Children and teenagers
- Limited mobility and adaptive planning
- Fees and payment
- What to wear and pack
- Food, toilets and recovery
- Photograph the ride without making it unsafe
- A strong half-day cycling plan
- A cycling and hiking day
- Combine Hell’s Gate with Crescent Island
- Hell’s Gate versus Mount Longonot
- Where to stay
- Common mistakes
- Booking brief
- Final verdict
- Frequently asked questions
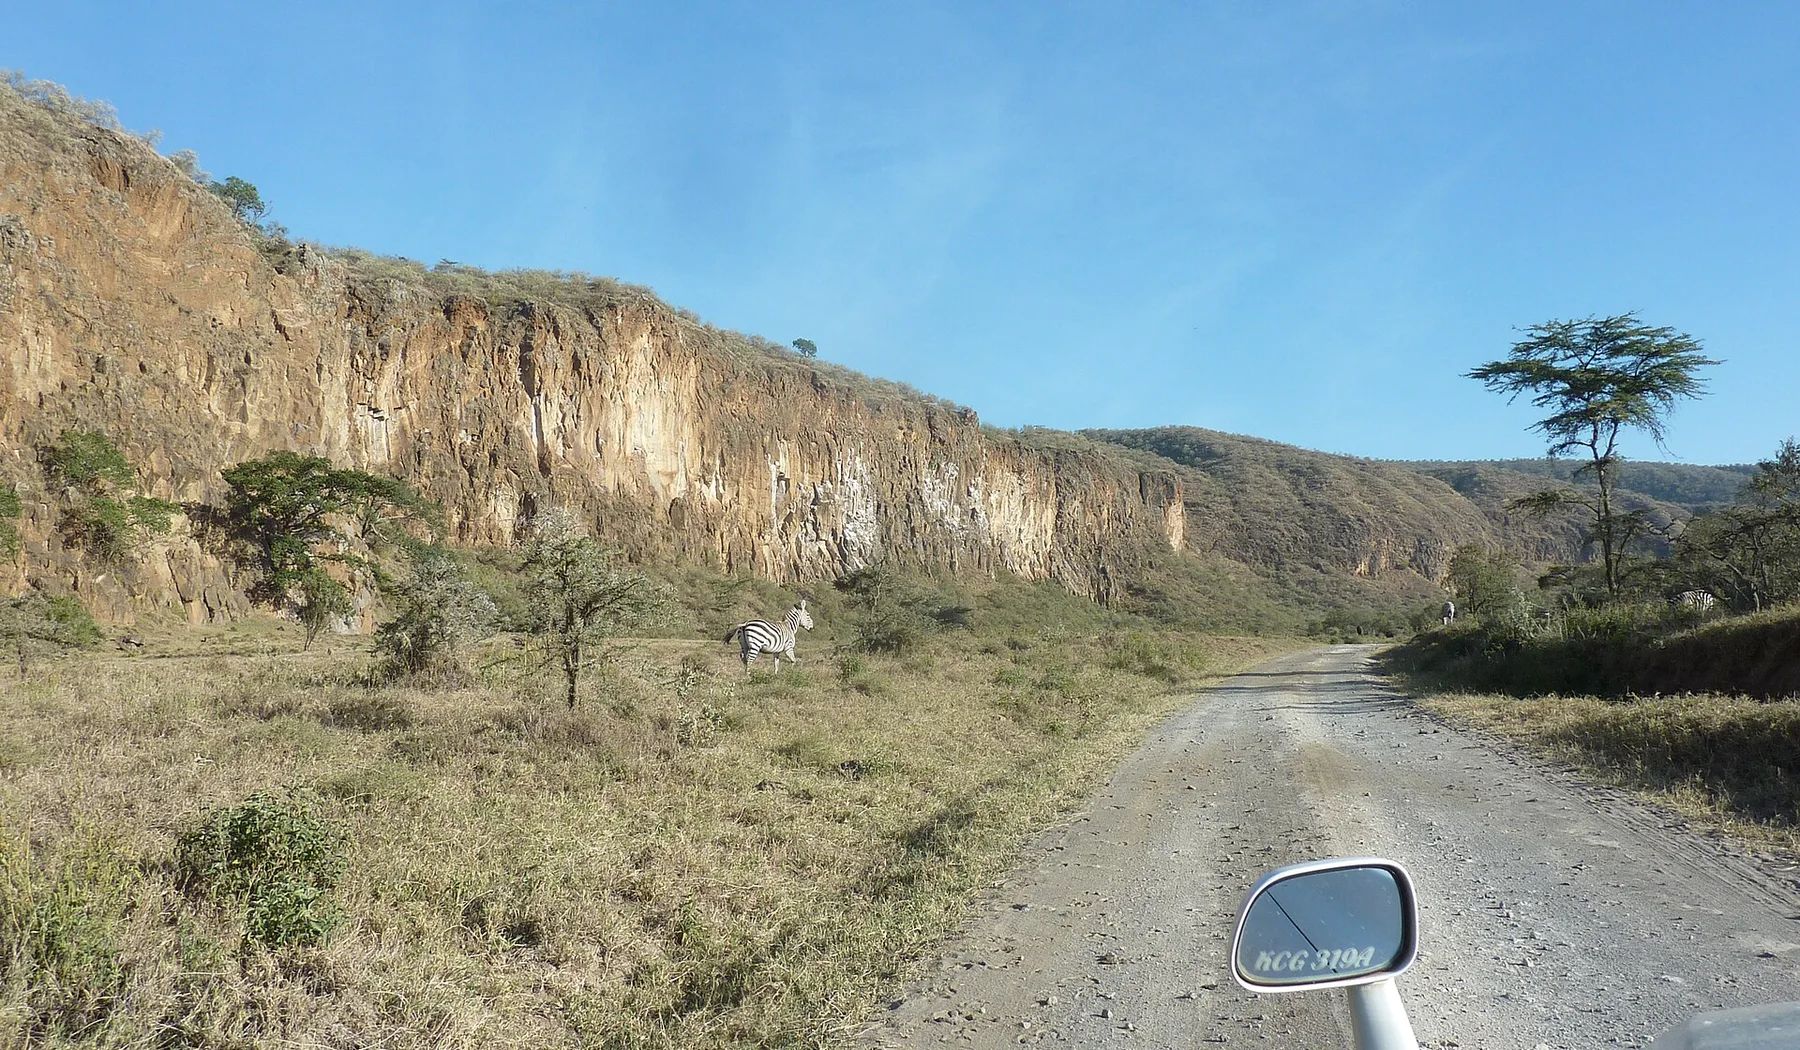
At Hell's Gate, the road does not disappear beneath a safari vehicle. You feel every change in it. Fine dust becomes corrugation, a gentle descent becomes the climb you must ride home, and the cliffs grow taller because you approach them at bicycle speed. Zebra may graze beyond the verge, a secretary bird may cross the plain, and steam on the horizon reminds you that this landscape is still geologically alive.
This Hell's Gate cycling and hiking guide is for travellers deciding how to move through the park, not merely how to enter it. It covers ordinary bikes, e-bikes, walking, vehicle support, route effort, wildlife distance, gorge access, weather, children, guides and the practical details that determine whether the day feels exhilarating or exhausting.
| Quick decision | Practical answer |
|---|---|
| Best start | As close to the 6:00 am gate opening as your route allows |
| Main cycling surface | Natural park road with dust, stones, corrugation and sandy sections |
| Is it flat? | Some sections feel gentle, but the return, wind and rough surface add effort |
| Ordinary bike or e-bike? | Choose by fitness, confidence, fit, battery and support, not pride |
| Can you hike? | Yes, where KWS currently permits it |
| Is gorge access guaranteed? | No. Confirm live status and flash-flood risk at the gate |
| Is a guide compulsory? | Not for every route, but valuable for safety, navigation, geology and wildlife |
| Can children cycle? | Only with a correctly sized, roadworthy bike and realistic riding ability |
| Park hours | KWS currently lists 6:00 am to 6:00 pm for day visitors |
Choose the experience before choosing the bike
Hell's Gate is unusual because movement is the attraction. Yet cycling is only one way to experience it. A strong plan begins with the group's weakest knees, least confident rider and tolerance for heat, then chooses the activity.
| Experience | Best for | Main limitation |
|---|---|---|
| Ordinary mountain bike | Regular riders who enjoy a physical day | Heat, rough bikes and the return effort |
| E-bike | Mixed fitness, older riders and people protecting energy | Fit, battery, weight and availability |
| Walking | Hikers who want geology and close observation | Distance, exposure and current trail access |
| Vehicle-supported cycling | Families and mixed abilities | Costs more and needs coordination |
| Game drive with short walks | Non-cyclists and limited mobility | Less immersion than riding |
| Rock climbing | Experienced or guided beginners at approved sites | Equipment, instructor and activity permission |
The complete Hell's Gate National Park guide covers the wider destination. This page stays focused on the active choices.
What the cycling route actually feels like
The familiar route from Elsa Gate follows the park road beneath cliffs and past Fischer's Tower towards the gorge area. The landscape is open, but the surface is not a city cycle lane. Stones, dust, loose sand, corrugation and passing vehicles can all appear in one ride.
Recent travellers describe the route in different ways. One called it “very rocky”, while another wrote that “The ride is also fairly flat”. Both can be true. Gradient is only one part of effort. Surface, wind, temperature, bicycle condition and the return direction matter too.
| Route factor | Why it changes difficulty |
|---|---|
| Corrugation | Vibrates hands, shoulders and saddle |
| Loose sand | Pulls the front wheel and unsettles beginners |
| Stones | Demand line choice and controlled speed |
| Dust | Reduces comfort and sometimes visibility |
| Wind | Makes an easy-looking return unexpectedly tiring |
| Heat | Raises effort and dehydration risk |
| Vehicle traffic | Requires predictable riding and awareness |
Distance is not the whole difficulty
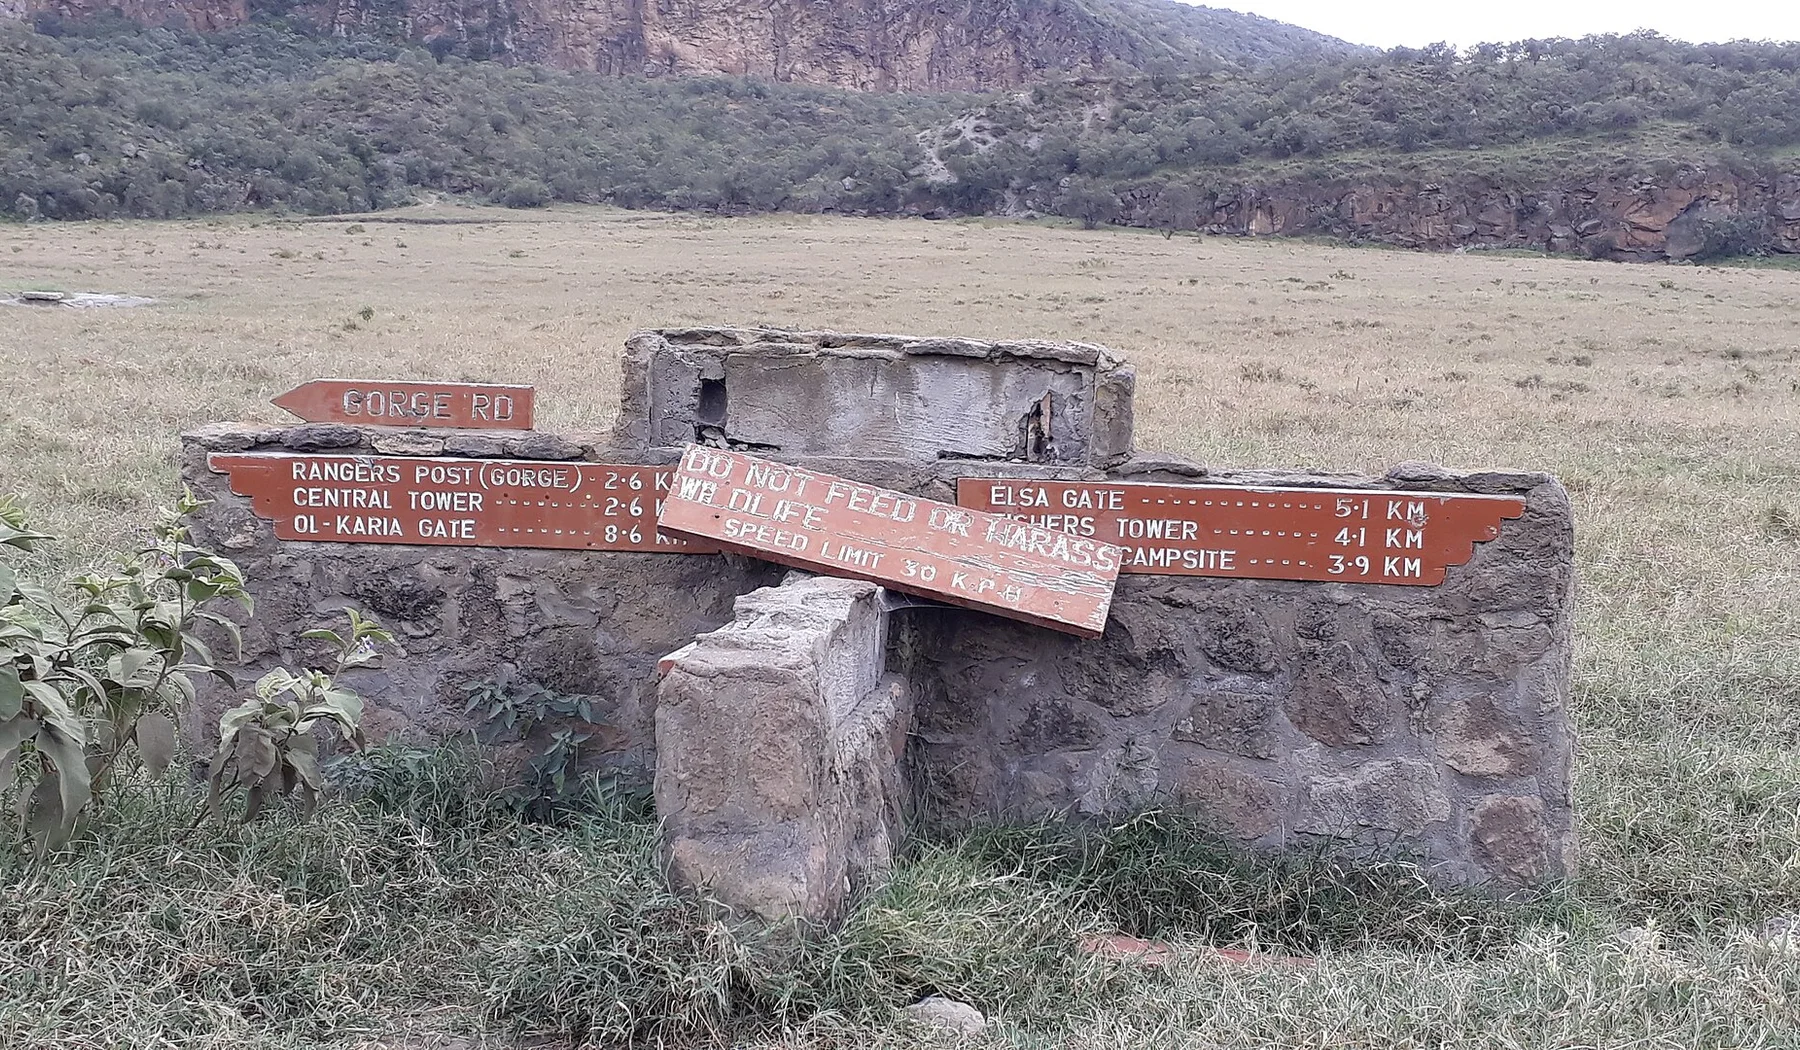
Some visitor accounts describe an approximately 8 km outward ride, while others describe roughly 16 km return. The exact route and turnaround can differ. Do not buy the day based on a single distance printed by a reseller. Ask where the cycle starts, where it ends, whether the bike returns the same way and whether a vehicle collects riders.
| Question | Why ask it |
|---|---|
| Is the quoted distance one way or return? | Prevents a surprise second half |
| Do we ride from the rental shop or gate? | Adds road and elevation outside the park |
| Where does the bike portion stop? | Defines the real cycling time |
| Is there a support vehicle? | Gives a safe exit for fatigue or mechanical failure |
| Must the bike be returned to the same point? | Determines whether the route is out-and-back |
A 16 km ride on rough ground in midday sun is not equivalent to 16 km on smooth tarmac in cool weather.
Inspect the exact bicycle
Do not accept “mountain bikes available” as proof of safety. Check the bicycle you will ride, with your body on it, before money and momentum make it awkward to refuse.
| Check | Pass condition |
|---|---|
| Front brake | Stops the wheel firmly without lever touching handlebar |
| Rear brake | Controls speed without sticking |
| Tyres | Inflated, tread present and no visible cuts |
| Wheels | Spin without severe wobble or rubbing |
| Chain | Runs smoothly through usable gears |
| Gears | Shift under light load without jumping |
| Saddle | Adjusts to a safe height and locks firmly |
| Handlebars | Straight, tight and comfortable |
| Pedals | Rotate securely without major play |
| Helmet | Correct size, intact shell and working strap |
One reviewer found bikes “a little run down”. The useful response is not panic. It is time to test several bikes and permission to reject an unsafe one.
Bike fit matters more than the brand
A famous logo cannot rescue a saddle that will not lower, a frame that is too large or brakes beyond a child's reach. You should be able to stand safely, reach both levers and turn the bars without your knees colliding.
| Rider | Fit priority |
|---|---|
| Short adult | Standover clearance and saddle range |
| Tall adult | Frame reach and seat-post extension |
| Child | Wheel size, brake reach and low gearing |
| Nervous rider | Upright control and predictable brakes |
| Experienced rider | Fit plus tyre, drivetrain and suspension condition |
Ride a short loop, shift through gears and brake firmly before entering. If the supplier discourages inspection, choose another supplier or drive.
Ordinary bike versus e-bike
An e-bike can turn a mixed-fitness day into a shared adventure. It is not a free pass. The bike is heavier, battery range matters, assistance can arrive abruptly and a puncture remains a puncture.
| Question | Ordinary bike | E-bike |
|---|---|---|
| Physical demand | Higher | Lower when assistance works |
| Weight | Usually lighter | Heavier to push or lift |
| Mechanical simplicity | Greater | Battery and motor add failure points |
| Mixed group pace | Can spread riders | Can help equalise pace |
| Cost | Usually lower | Usually higher |
| Best for | Confident, fit cyclists | Mixed fitness or energy conservation |
Ask the supplier to show battery charge, assistance levels, brake function and what happens if power fails. Do not take an unfamiliar e-bike straight onto loose gravel at maximum assistance.
When a support vehicle is worth it
A support vehicle is not a defeat. It can carry water, first aid, a spare bike and a tired rider. It is especially useful for families, mixed generations, travellers with a recent injury, uncertain weather or a schedule that cannot absorb a long mechanical delay.
| Group | Support value |
|---|---|
| Family with children | High |
| Mixed ordinary and e-bikes | High |
| Experienced adult cyclists | Optional |
| One hesitant rider | High |
| Photography-focused group | Useful for equipment and flexible stops |
| Solo rider | Guide or reliable support strongly preferred |
Agree whether the vehicle follows, waits at fixed points or collects only by phone. Mobile signal should not be assumed in every section.
Plan for punctures and mechanical failure
A repair kit is useful only if someone knows how to use it and the bicycle has compatible parts. Ask whether the supplier carries tubes for every wheel size, a working pump, tyre levers, a multi-tool and a spare bicycle. E-bikes may use heavier tyres and unfamiliar axle systems, so a generic tube is not enough.
| Failure | First response | When to stop the ride |
|---|---|---|
| Puncture | Move completely off the road and inspect safely | No tube, damaged tyre or repeated puncture |
| Chain drops | Stop pedalling and lift it carefully | Bent derailleur or repeated jumping |
| Brake fades | Dismount immediately | Any brake cannot stop the wheel firmly |
| Saddle slips | Stop and tighten to correct height | Clamp will not hold |
| E-bike loses power | Check display and connection without opening battery | Heavy bike cannot be ridden safely without assistance |
Do not continue because the group has already paid. A mechanical problem is easier to solve beside a support vehicle than after a downhill loss of control.
Learn the e-bike before the loose ground begins
Power assistance can surprise a rider who starts turning while the front wheel is angled. Begin on low assistance, practise starting, stopping and changing modes, then test braking with the extra weight.
| E-bike skill | Why practise it |
|---|---|
| Start in low assistance | Prevents a sudden lurch |
| Brake before a turn | Heavy bikes carry more momentum |
| Shift before a climb | Reduces strain on chain and motor |
| Keep a steady cadence | Improves control and battery use |
| Dismount before technical ground | Avoids fighting a heavy frame at low speed |
Battery percentage alone does not describe range. Rider weight, assistance level, wind, surface and gradient all change consumption. Agree what reserve triggers a turnaround.
Start early for comfort, wildlife and margin
KWS currently lists the gates as open from 6:00 am to 6:00 pm. Early riders gain cooler air, softer light, less accumulated fatigue and more time to handle a puncture or change plans.
| Start time | Likely trade-off |
|---|---|
| 6:00 to 7:30 am | Coolest ride, best margin and quieter road |
| 8:00 to 9:30 am | Still workable, but heat builds on return |
| Late morning | Strong sun and reduced flexibility |
| Afternoon | Wind, weather and gate margin become more important |
If travelling from Nairobi, an overnight near Naivasha usually creates a better cycling day than leaving the city late. The Nairobi to Lake Naivasha guide explains the road timing.
Heat, sun and water
Open terrain gives little reliable shade. Carry water on the bike or in a stable hydration pack, not in a vehicle that may be kilometres away.
| Rider and conditions | Sensible starting water |
|---|---|
| Cool short ride | At least 1 litre per person |
| Warm standard ride | Around 1.5 to 2 litres per person |
| Long ride or hot day | More, with electrolytes and vehicle reserve |
| Child | Frequent small drinks and adult monitoring |
These are planning ranges, not medical prescriptions. Individual needs vary. Headache, dizziness, nausea, unusual fatigue and confusion are reasons to stop, cool down and seek help.
Dust, wind and rain
Dry roads can produce dust behind vehicles. Rain can settle dust but make stones, mud and gorge surfaces slippery. Wind can slow a return leg and affect balance.
| Condition | Adjustment |
|---|---|
| Dust | Glasses, buff, greater vehicle distance and protected camera |
| Strong sun | Early start, sunscreen and covered shoulders |
| Wind | Shorter route and more return time |
| Light rain | Shell, lower speed and careful braking |
| Storm risk | Confirm KWS advice and avoid gorge commitments |
| Heavy rain upstream | Treat gorge access as unsafe unless authorities confirm otherwise |
Share the road predictably
Cyclists, pedestrians and safari vehicles may use the same road. Ride single file when vehicles approach, keep left, signal before changing line and do not stop across the carriageway for wildlife.
| Situation | Safe habit |
|---|---|
| Vehicle approaching from behind | Hold a predictable line and let it pass where space allows |
| Loose sand | Reduce speed before it, keep movement smooth |
| Wildlife beside road | Stop at distance without blocking traffic |
| Downhill | Brake before rough patches, not sharply inside them |
| Group spreading out | Regroup at agreed safe points |
Dust from one vehicle can hide the next. Wait for visibility before moving back into the road.
Wildlife distance on a bicycle
The absence of a car body changes the encounter. Zebra, giraffe, antelope and warthog may be visible, but buffalo and any stressed animal demand serious distance. Never ride between herd members or use a bicycle to pursue an animal.
| Animal behaviour | Rider response |
|---|---|
| Feeding continues | Stay quiet and keep distance |
| Heads lift together | Stop advancing |
| Animal moves across road | Wait and leave the route open |
| Buffalo visible | Follow guide instructions and do not approach |
| Animal runs | Stop rather than joining the movement |
One cyclist described the experience as “more intimate than seeing them from a safari vehicle”. Intimacy should produce restraint, not closer pursuit.
Birds and cliff life reward slow riders
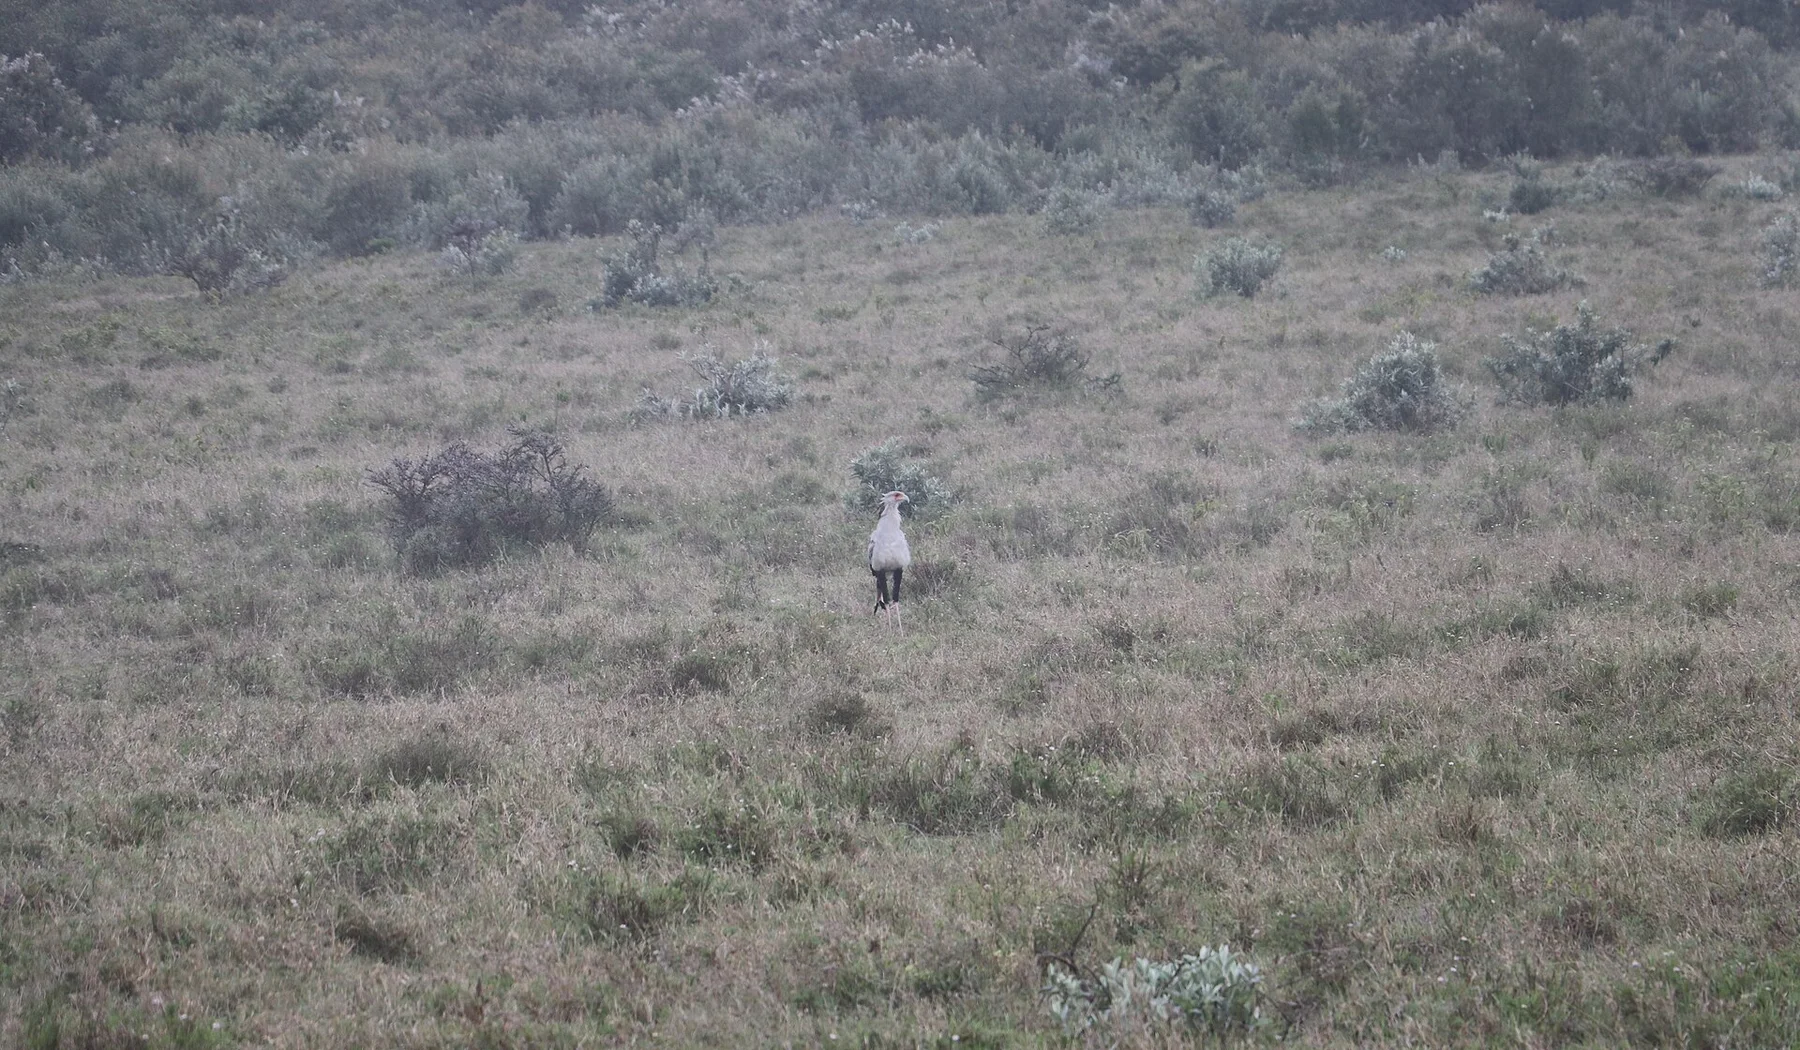
Hell's Gate is not only zebra beside a road. Look upward for raptors and vultures, and across open ground for secretary birds. UNESCO identifies the cliffs, gorge and fragile habitats as important geological and biological resources.
| Birding choice | Benefit |
|---|---|
| Stop below, not directly against, a cliff | Wider field of view and less disturbance |
| Carry binoculars in a secure harness | Faster use without swinging into handlebars |
| Use a guide who knows calls | Finds birds before they fly |
| Keep distance from nests | Protects breeding behaviour |
Hiking without pretending every trail is open
Hell's Gate has long been associated with walking and gorge exploration, but access can change after floods, erosion, geothermal activity or management decisions. An old blog photograph is not permission.
Ask at the gate which walking routes are open, whether a guide is required or recommended, how long the route takes today and where the exit returns you.
| Live question | Why it matters |
|---|---|
| Which trail is open today? | Closures may affect only part of the park |
| Is the lower gorge open? | Conditions and rules can change |
| What was the upstream weather? | Flash floods can follow rain elsewhere |
| Is a guide required? | Current rules override old reports |
| Where does the walk finish? | Determines bike and vehicle collection |
Gorge safety and flash floods
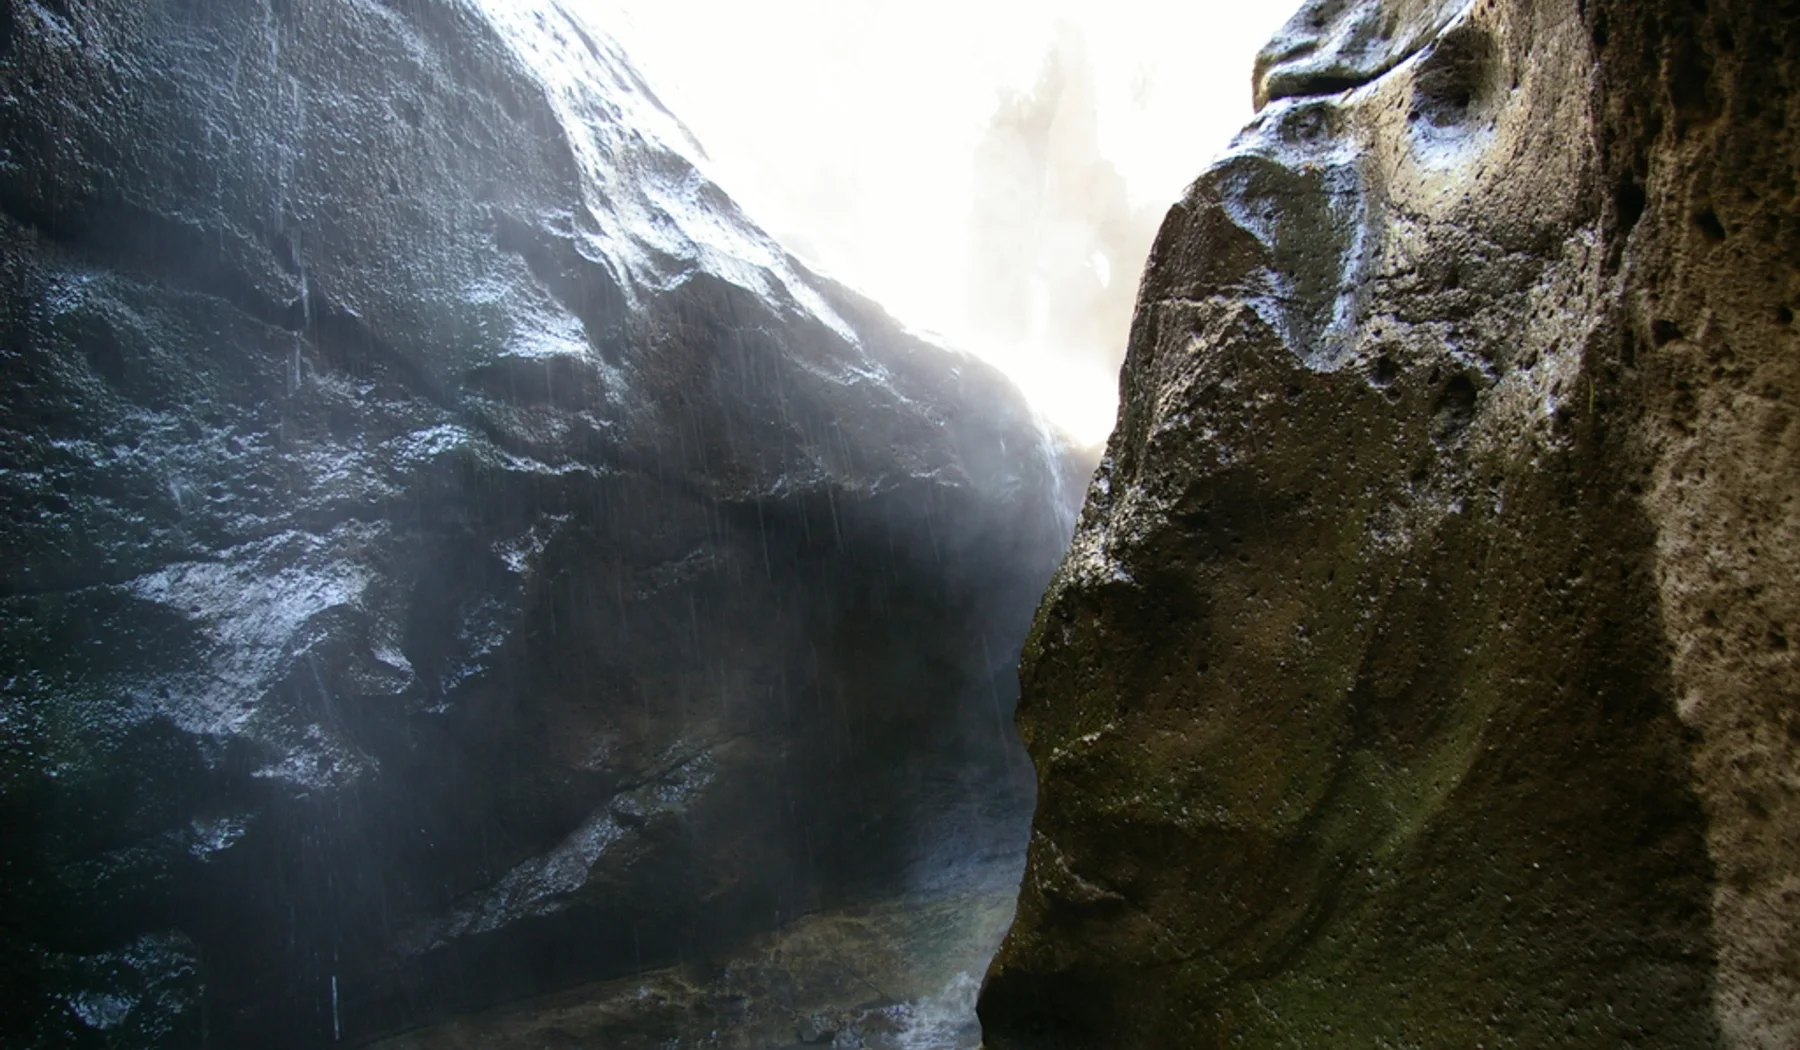
Narrow gorges can fill rapidly. Rain does not need to fall directly above you for upstream water to arrive. Darkening sky, thunder, sudden muddy water, rising water, debris noise or an instruction from KWS are reasons to leave immediately.
| Warning | Response |
|---|---|
| Gorge closed | Do not enter |
| Rain forecast in catchment | Choose an open high-ground route |
| Water begins rising | Exit immediately by the guide's safe route |
| Group member struggles on wet rock | Turn back before the next obstacle |
| Guide and ranger disagree | Follow the more conservative official instruction |
Wet rock can look dramatic in photographs. It is also slippery. The hiking plan must survive the sentence, “The gorge is closed today.”
A good hike does not require the lower gorge
When gorge access is restricted, the day can still focus on escarpment views, volcanic formations, Fischer's Tower, approved tracks and natural-history stops. Ask the guide to explain the replacement before setting out.
| If the planned route closes | Useful alternative |
|---|---|
| Lower gorge | Approved high-ground walk or geological viewpoint |
| Long cycle | Short ride plus vehicle circuit |
| Climbing site | Guided geology and wildlife walk |
| Stormy afternoon | Early exit and sheltered Lake Naivasha activity |
The alternative should match the group's interests rather than imitate the original with unsafe shortcuts.
Geothermal areas are not a spa trail
Steam, hot ground and water are signs of real geothermal energy. Do not touch water, test vents with a hand, leave marked routes or assume a shallow pool is cool.
| Hazard | Better behaviour |
|---|---|
| Steam obscures ground | Stop and follow the guide |
| Unmarked side path | Stay out |
| Hot water | Do not touch or enter |
| Sulphur smell or discomfort | Move to fresh air and alert the guide |
| Geothermal infrastructure | Respect barriers and operational areas |
Fischer’s Tower and climbing
Fischer's Tower is both a landmark and a climbing site. Climbing requires current permission, suitable equipment and a competent instructor. A helmet and rope in a photograph do not prove professional standards.
| Before climbing | Confirm |
|---|---|
| Instructor | Training, experience and rescue plan |
| Equipment | Harness fit, helmet, rope, anchors and inspection |
| Route | Suitable grade and current access |
| Child | Age, attention, fear response and instructor ratio |
| Weather | No unsafe rain, lightning or wind |
A family reviewer praised an instructor who was “extra patient” with a frightened child. Patience is a safety quality, not just good service.
Should you hire a guide?
A guide can check bikes, set pace, interpret geology, spot wildlife, manage road position and adjust when a trail closes. The useful question is whether the guide does those things, not whether a badge appears in a package description.
| Ask a prospective guide | Strong answer sounds like |
|---|---|
| What if one rider is slower? | We ride at the slowest safe pace and have regroup points |
| How do you check bikes? | Specific brake, tyre, gear and fit checks |
| What if the gorge is closed? | A named alternative route |
| What first aid do you carry? | Clear kit and emergency process |
| How do you manage buffalo? | Distance, route change and ranger contact |
One reviewer valued a guide who “kept checking that everyone was cycling ok”. That is more meaningful than constant storytelling while the group spreads out behind.
Children and teenagers
A child who cycles confidently on a paved estate road may still struggle with sand, corrugation, traffic and a long return. The exact bicycle must fit, the child must reach both brakes, and an adult must be able to stay beside them.
| Child profile | Better plan |
|---|---|
| Small or occasional rider | Vehicle visit with short approved walks |
| Confident older child | Short supported cycle after full bike test |
| Teen regular cyclist | Standard route with adult and guide |
| Mixed siblings | Separate activity lengths or support vehicle |
| Child anxious around animals | Drive first, then choose a quiet short walk |
Read the Kenya safari with children guide before placing this active day inside a longer itinerary.
Limited mobility and adaptive planning
Cycling may not suit every traveller, but the park can still offer cliffs, geothermal scenery and wildlife from a vehicle with carefully chosen stops. Ask about current surfaces, toilets, transfer help and how close a vehicle can reach an approved viewpoint.
| Need | Planning response |
|---|---|
| Limited walking endurance | Vehicle loop with short level stops |
| Balance difficulty | Avoid bicycle and wet gorge surfaces |
| Joint pain | Reduce corrugation exposure and choose supportive seating |
| Wheelchair | Confirm exact vehicle, ramps and ground at each stop |
| Mixed group | Let some ride while others meet at agreed viewpoints |
The accessible Kenya safaris guide helps turn a general “accessible” claim into practical questions.
Fees and payment
Conservation fees, cycling charges, vehicle fees, bike rental, guide, climbing and transfers may be separate. KWS fee proposals and final schedules can change, so confirm the live amount through KWS and the park gate rather than relying on an old screenshot.
| Cost line | Who normally controls it |
|---|---|
| Park conservation fee | KWS |
| Cycling activity fee | KWS under the current schedule |
| Bicycle or e-bike rental | Rental supplier |
| Guide | Guide or operator |
| Support vehicle | Transport provider |
| Climbing instruction and equipment | Specialist provider |
| Nairobi or Naivasha transfer | Driver or itinerary operator |
Use the Kenya safari cost guide to compare the whole day, not only park entry.
What to wear and pack
| Item | Why |
|---|---|
| Properly fitted helmet | Essential cycling protection |
| Closed shoes | Pedal grip and walking protection |
| Padded shorts or comfortable trousers | Corrugation and saddle comfort |
| Gloves | Grip and hand comfort |
| Sunglasses | Dust, wind and sun |
| Sunscreen and hat | Exposed landscape |
| Water and electrolytes | Heat and physical effort |
| Light waterproof | Sudden weather change |
| Small first-aid kit | Blisters and minor injuries |
| Dry bag | Phone and camera protection |
| Repair kit and pump | Puncture and basic mechanical response |
The broader Kenya packing guide covers the rest of a safari circuit.
Food, toilets and recovery
Do not assume food and water will appear at the moment the group becomes hungry. Eat a proper breakfast, carry a compact snack and confirm where toilets and safe drinking water are available on the current route.
| Need | Plan before entering |
|---|---|
| Breakfast | Arrange an early meal or packed option |
| Ride snack | Carry something heat-stable and easy to eat |
| Toilets | Ask at the gate and planned stops |
| Lunch | Reserve after the ride, not during the coolest cycling hours |
| Recovery | Water, shade, dry shirt and time before the next activity |
A hard ride followed immediately by a long road transfer can be miserable. Leave time to wash dust away, eat and let the group recover.
Photograph the ride without making it unsafe
The cliffs, road and small scale of a cyclist create better storytelling images than a close wildlife selfie. Stop completely off the carriageway before using a phone or camera. Never ride one-handed through loose ground for video.
| Image | Safer method |
|---|---|
| Cyclist beneath cliffs | Photographer stands at a safe pull-off while rider passes predictably |
| Zebra beside route | Stop at distance and use focal length |
| Group portrait | Park bikes fully off the road |
| Gorge texture | Photograph only from an approved stable position |
| E-bike action | Use a stationary photographer, not a rider filming backwards |
Ask permission before photographing guides or other visitors, and never move closer to a nest or animal for a cleaner background.
A strong half-day cycling plan
| Time | Plan |
|---|---|
| 6:00 am | Gate entry, live route check and bike fitting |
| 6:30 am | Begin at the slowest rider's pace |
| 7:15 am | Wildlife and cliff stop away from traffic |
| 8:15 am | Fischer's Tower or approved turnaround point |
| 9:00 am | Continue only if heat, bikes and group remain strong |
| 10:00 am | Begin return with water and mechanical check |
| 11:30 am | Finish, cool down and leave margin for lunch |
Exact times depend on route, but the structure protects the cooler hours and keeps the return from becoming an emergency.
A cycling and hiking day
| Stage | Decision gate |
|---|---|
| Early cycle | Are every rider and bike still comfortable? |
| Arrival near walk start | Is the route officially open? |
| Weather check | Is upstream rain or storm risk acceptable? |
| Hike | Does every person have footwear, water and ability? |
| Return | Is there enough light and energy to ride back? |
If any answer is no, shorten the walk, use the support vehicle or return. The park is not diminished because you skipped a closed gorge.
Combine Hell’s Gate with Crescent Island
Cycling is physical and exposed. Crescent Island is slower, greener and focused on walking among plains game. They can share a Naivasha stay, but both deserve their own time.
Use the Lake Naivasha guide to see how the park, lake, town and southern shore fit together before choosing the order.
| One-day order | Why |
|---|---|
| Hell's Gate early, Crescent Island later | Prioritises cool cycling, but requires careful boat return before dusk |
| Crescent Island early, short Hell's Gate drive later | Better for families and photographers |
| Separate mornings over two nights | Best pace and weather flexibility |
Read the Crescent Island walking safari guide and the Lake Naivasha boat safari safety guide before buying a bundle.
Hell’s Gate versus Mount Longonot
| Priority | Hell's Gate | Mount Longonot |
|---|---|---|
| Cycling | Strong fit | Not the main activity |
| Summit challenge | No | Strong fit |
| Adjustable effort | Easier with vehicle support | Harder once committed to ascent |
| Geology | Cliffs, towers, gorge and geothermal setting | Crater volcano and rim |
| Family flexibility | Higher | Depends strongly on hiking ability |
The Mount Longonot guide helps active travellers choose one demanding day rather than stacking both.
Where to stay
The best base depends on the gate, start time and whether Lake Naivasha activities follow. A room far from the gate can erase the benefit of an early alarm.
| Base | Advantage | Check |
|---|---|---|
| South Lake Road | Near many lake and park activities | Exact gate transfer time |
| Naivasha town | Practical road connections | Early breakfast and vehicle pickup |
| Lakeside lodge | Relaxed recovery and boat access | Distance to Hell's Gate gate |
| Nairobi | Avoids an overnight | Very early departure and traffic risk |
Use the planned where to stay at Lake Naivasha guide and things to do at Lake Naivasha to build the wider stop.
Common mistakes
| Mistake | Better choice |
|---|---|
| Choosing a bike by colour or brand | Test brakes, fit, tyres and gears |
| Starting after a leisurely late breakfast | Protect the cool morning |
| Assuming a quoted distance is return | Ask for the exact start and finish |
| Treating “mostly flat” as easy | Add surface, wind, heat and return fatigue |
| Entering a gorge because an old review did | Follow today's KWS status |
| Riding close to wildlife | Stop at distance and leave movement routes open |
| Putting all water in the vehicle | Carry water on each rider |
| Combining too many Naivasha activities | Choose one demanding and one gentle experience |
Booking brief
Send the date, hotel, rider heights, ages, cycling frequency, ordinary or e-bike preference, desired distance, guide request, support vehicle, hiking interest and any medical or mobility concern.
| Detail | Why it belongs in the brief |
|---|---|
| Height and inseam | Bicycle fit |
| Recent cycling | Realistic route choice |
| Child age and skill | Safety and bike availability |
| E-bike need | Battery and frame reservation |
| Guide | Pace, wildlife and geology |
| Support vehicle | Exit and equipment plan |
| Hiking aim | Live trail and gorge check |
| Next activity | Protects time and energy |
Final verdict
Hell's Gate rewards travellers who want to participate in the landscape. The best ride is not the fastest or longest. It is the one where the bicycle fits, the group stays together, wildlife keeps its space and the return still feels enjoyable.
Use this Hell's Gate cycling and hiking guide to choose the activity honestly, then let current KWS advice, weather and the condition of the exact equipment decide the day's final route.
Frequently asked questions
Is cycling in Hell’s Gate difficult?
It ranges from moderate to tiring depending on route, bike, surface, wind, heat and fitness. The terrain may look gentle while corrugation and the return add effort.
How far is the bike ride?
Routes differ. Some travellers describe about 8 km outward and roughly 16 km return. Confirm the exact start, turnaround and collection arrangement.
Are e-bikes available?
Recent visitors report using e-bikes. Availability, size, battery and support vary, so reserve and test the exact bike.
Do I need a guide?
Not every cycling route requires one, but a capable guide adds bike checks, pace control, navigation, geology, wildlife awareness and alternatives when access changes.
Is the gorge open?
Do not assume it is. Ask KWS at the gate on the day because floods, erosion, geothermal conditions and management decisions can change access.
Can children cycle?
Only when a correctly sized, roadworthy bicycle is available and the child is confident on loose natural roads. A support vehicle is wise.
What time does Hell’s Gate open?
KWS currently lists 6:00 am to 6:00 pm for day visitors. Start early for cooler conditions and more safety margin.
Can I cycle near animals?
Wildlife may be visible beside the route, but keep distance, never chase or split a herd and follow guide or ranger instructions around buffalo.
Can I combine Hell’s Gate and Lake Naivasha?
Yes, but keep one activity demanding and the other gentle. Avoid a late boat return or an overfilled day.
What should I pack?
Bring a fitted helmet, closed shoes, water, sun protection, glasses, light waterproof, phone protection and a repair plan.
Sources and further reading
Plan your Hell’s Gate day
Share your date, party, rider heights, child ages, recent cycling, ordinary or e-bike preference, guide, support vehicle, hiking aim, hotel and next activity.